Find your plate diary

Type your plate number in the white box in the upper left corner then hit Enter.

Showing posts with label Recipes. Show all posts

Roasted Garlic Jelly on ciabatta

This week's Recipe of the Week isn't so much of a recipe but more of an interesting food idea. Why not pick up some interesting food from a local farmers market this summer? How about a jar of locally made jam from one vendor and a loaf of bread from another?

The idea came from Pam & Frank, who commented:

This would be a neat idea for a Pass It On Plate. I found this jam in a little Italian gift shop and plan to put it on a Pass It On Plate with some ciabatta bread for a gift.

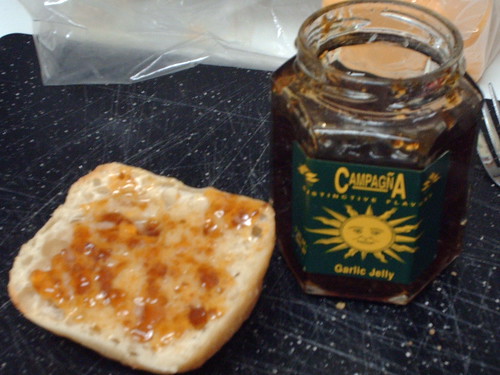
Frank got garlic jelly one year for Christmas. He's a huge garlic freak and often gets something garlicky. For whatever reason, this jar ended up in the back of the cupboard and it was forgotten. Not too long ago, during a cupboard clean out it was re-discovered, opened, and thoroughly enjoyed.

Here it is spread over butter on half a ciabatta roll. Mmm. So so good.
I'm going to have to find a recipe for it and make more.

Meatballs


Meatball scoop, originally uploaded by Adventures of Pam & Frank.

Who says you have to put sweets on your Pass It On Plate? Why not a mound of meatballs?

This would be perfect for a neighborhood pot luck or summer party hostess gift. You could include a bag of little pretzel sticks so everyone can poke a pretzel into a meatball to pick it up - instead of using toothpicks or forks - then they can eat the pretzel. Less dishes to wash and less trash to throw out.

This Recipe of the Week is from Pam & Frank at Pass It On Plates. Pam says:

We had meatballs the other night. I used to make lousy meatballs but finally figured it out. We don't use pre-made mixes or dry soup blends because we want to avoid sugar and MSG in our food. Here's my recipe:

1 lb ground beef
1 lb ground turkey, pork, or lamb
1 c dry bread crumbs (or if you're on the Atkins diet like we are, substitute crushed pork rinds)
1 egg
1 tbs worchestershire sauce or anchovy paste
1 tbs yellow mustard
salt and pepper to taste


Don't forget to add seasoning such as:
Italian - rosemary-oregano-basil-garlic powder-fennel seeds
Tex Mex - oregano-lime juice-onion powder-garlic powder-cumin-dried red pepper-chili powder
French - oregano-rosemary-tarragon-thyme-lavender
Swedish - nutmeg
BBQ - garlic powder-onion powder-celery seed-chili powder-honey or molasses (just a tbs)
Middle Eastern - garlic powder-onion powder-ginger-shawirma (if you can find it)

Mix together gently with your fingers. Don't squish with your hands or they'll be little rock meatballs. Form into balls on a large baking sheet and bake for 30 minutes at 350.

Add your favorite sauce...

Also, we love this commercial style scoop for making the meatballs. It makes the meatballs all uniform and cook up great. Also perfect for portion control if you're dieting or serving lots of people at a party. This little scoop makes 2 doz meatballs per lb of ground meat.

Here is a photo of how nice and uniform they all look on the pan: www.flickr.com/photos/adventurespf/3274671619/

Mincemeat & Marzipan Teabread


Mmmm, can you almost smell this yummy teabread? This recipe was submitted by ginparis2002 to our Recipe of the Week photo group.

ginparis2002's notes in the recipe say:

I added vanilla essence and a few dried cranberries to the following recipe. Apologies to any Americans wanting to bake this - the recipe is in metric measurements. I've had to learn to adjust since moving to Europe and you know what? I like this way of measuring better!

Mincemeat & Marzipan Teabread

Seves 12.
Well-wrapped, keeps for 4 to 5 days

200g/8oz self rising flour
100g/4oz cold butter, cut into pieces, plus extra for greasing
85g/3 oz light muscovado sugar (or brown sugar or raw sugar)
85g/3oz marzipan, cut into 1/2 inch cubes
2 eggs
300g/10oz mincemeat (from a jar)
2 tbsp flaked almonds
powdered sugar for dusting (optional)

1. Heat oven to 180 degrees C. Butter a 1kg/2lb loaf tin and line the base with wax paper. Tip the flour into a bowl, add cold butter and rub until mixture forms fine crumbs. Stir in the sugar and marzipan.

2. In another bowl, lightly whisk the eggs, then stir in the mincemeat. Stir this into the flour mixture until evenly combined. Spoon into the prepared loaf tin, smooth the top, then sprinkle the flaked almonds over. Bake for 1 hour until the teabread has risen and is golden brown, or a skewer inserted comes out clean. If you like, you can lightly dust the teabrad with icing sugar while it is still hot.

3. Allow to cool in the tin for 10 minutes, then tip on to a wire rack to cool completely. Peel off the lining paper and cut into slices - it's very good spread with butter.

Uploaded by ginparis2002

Gummy Sushi Frogs

Gummy Sushi Frogs

Here is your recipe of the week: Gummy Sushi Frogs from Flickr's chrysophylax
Isn't this a fun idea? And a totally memorable treat for your Pass It On Plate.

-------------------------

Gummy Nigiri. Quick and simple recipe.. make Rice Krispy Treats (recipe on the box or on the marshmallow package), place a gummy fish, swedish fish or whatever else sounds good (or gross) and wrap with a cut strip of fruit rollup.

Semi-Sweet Chocolate and Reese's Peanut Butter Cheesecake bars

Our recipe of the week is absolutely to die for. If you haven't yet found a really good reason to break your New Years' diet, this just may do the trick. (...Sorry!) This tempting recipe is courtesy of ABarrett, who has other screen-licking food photos and recipes posted at flickr.

Recipe:

2 1/2 cups graham cracker crumbs
3/4 cup (1 1/2 sticks) butter, melted
3/4 cup granulated sugar, divided
1 2/3 cups (10-oz. pkg.) Milk Chocolate & Peanut Butter Morsels, divided
2 pkgs. (8 oz. each) cream cheese, softened
1/4 cup all-purpose flour
1 tablespoon vanilla extract
4 large eggs

Directions:
PREHEAT oven to 325° F.

COMBINE crumbs, butter and 1/4 cup sugar in medium bowl. Remove 1 cup mixture and reserve for topping. Press remaining mixture onto bottom of ungreased 13 x 9-inch baking pan. Sprinkle 3/4 cup morsels over crust.

BEAT cream cheese, remaining sugar, flour and vanilla extract in large mixer bowl until smooth. Add eggs, one at a time, beating until smooth. Pour over crust and morsels in pan. Sprinkle with reserved crumb topping and remaining morsels.

BAKE for 25 to 30 minutes or until set. Cool completely in pan on wire rack. Refrigerate until firm. Cut into bars

Photo and recipe uploaded by ABarrett . Republished here with permission.

Cranberry Bread

This recipe of the week is a guest blog post from Shannon at Fox & Prince. This cranberry bread has a secret ingredient that transforms the flavor. Enjoy!
~~~~~~~~~~~~~~~~~~~~~~~~~~~~~~~~~

Put This on Your Plate and Pass It: Cranberry Bread!


There is nothing, NOTHING more beloved in our house than my mom's Cranberry Bread recipe. I was practically raised in a Massachusetts cranberry bog. Seriously, check out this google earth view of my neighborhood. See all the red? Yeah, that's cranberries. You can't read it in the photo, but the road to the right is called Cranview Road. So, cranberries? I know 'em and love 'em. And every fall my mom would stock up on the tart little berries and make loaves upon loaves of her cranberry bread, and we would wolf down every last crumb because it is the BEST bread in all the universe. And it has a surprising secret ingredient, which is fun all by itself.

Sadly, my fiance hated cranberries when we first met. Even worse, he thought he hated cranberry bread. This recipe is a lot of work so it seemed like a waste just to make it for myself, but nevertheless I couldn't live without it. So I made it, and fiance tried it, and then he promptly wolfed down two more slices. Now ten years later I bemoan that it is a lot of work and I hardly get to eat any of it! Anyway, it's a Thanksgiving tradition in our house, and it's the perfect hostess gift to bring along if someone else is doing the cooking. Here's the recipe:


Joan's Cranberry Bread
Recipe makes one loaf, but can be doubled to make two.
  • 2 C flour
  • 1 C sugar
  • 1 1/2 tsp baking powder
  • 1/2 tsp baking soda
  • 1/2 tsp salt
  • 2 tsp grated orange peel
  • 2 tsp shortening
  • 3/4 C orange juice
  • 1 1/2 C shredded mild cheddar cheese
  • 1 egg, beaten
  • 1 C cranberries
  • 1/2 C chopped walnuts
First prepare the cranberries: Wash in cold water and discard any don't float, and any that are immature (white). Remove any leaves or stems. Cut each berry in half using a sharp knife. No cheating - it's tedious but you can't use a food processor or it won't taste any good at all! Discard any berries that are mushy.

Preheat oven to 350 degrees. Grease a 9x5x3 loaf pan. Measure all ingredients from flour to orange peel into a large bowl and mix. Cut in shortening. Add orange juice, stir until combined. (If batter is very dry at this point you may wish to add another small splash of orange juice.) Add egg and cheese, stir until combined. Stir in cranberries and nuts.

Pour into loaf pan, bake 60-70 minutes until knife inserted into center comes out clean. Invert pan and turn out loaf. Allow loaf to stand at room temperature at least overnight before serving to allow flavors to develop. Serve or freeze.

This loaf freezes exceedingly well, as do the cranberries. You can prepare and cut an entire bag of cranberries, then pop the extras into a baggie and freeze. Next time you make the bread, there is no need to defrost them, just dump them in frozen.

Enjoy!


Turtle Snacks


Turtle Snacks, originally uploaded by passitonplates.

These are so darned quick and easy to make... and a good thing, too, since they disappear fast. Better double the recipe and hide a dozen or two for yourself.

ingredients:
3 doz pretzels, waffle shaped or traditional (shown)
1 bag of Rolo candies
3 doz shelled pecan halves

Preheat oven to 250 F. Line a large baking sheet with parchment or foil. Spread pretzels on lined pan in a single layer. Place one unwrapped Rolo in the center of each pretzel. Place the pan in the oven for 4-5 minutes. Remove from oven and press one pecan half into the top of each Rolo. If the Rolo candies are not soft enough to squish down, return the pan to the oven for one or two more minutes.

When all the pecan halves have been pressed into the Rolos, place the pan in the freezer for 5 to 10 minutes to firm up the candy.

Store between layers of waxed paper in an airtight container.

Don't worry about how long they will last. Someone will find the container of these Turtle Snacks and they'll be gone before you know it.

This recipe is part of the Pass It On Plates' Recipe of the Week pool at Flickr.com

Chocolate Covered Pretzel Sticks

This is a really neat gifty food idea I saw at a recent craft fair. I'm sorry I didn't get the name of the lady selling these because she had such cute ideas and I want to give her credit for this. Plus she was really nice and I thought she would be fun to hang out with.

Besides making a fun gift to take to work or give to the teachers at school on a Pass It On Plate, these pretzel sticks would be a cute tie-in on any package, or a great stocking stuffer idea.

Ingredients:
24 Long pretzel sticks, the size of long cigars
2 c chocolate chips, andes candies, or any kind of chocolate melts
Baking decorations such as colored sugar, crushed candy canes, cookie sprinkles, etc

Instructions:
Line a cookie sheet with waxed paper and set aside in a cool area.

Place the chocolate chips or other meltable ingredient in a 2 cup glass measuring cup. Microwave on medium 30 seconds at a time, stirring between blasts, until smooth. Be careful to not overcook or it will burn, becoming hard and crumbly.

Tilt the measuring cup to the side and stick one pretzel stick in the melted chocolate. Twirl the pretzel to coat, then lift and allow it to drip. Place the pretzel on the waxed paper and sprinkle with baking decorations.

Reheat the chocolate as necessary, being careful not to burn it.

When completely cool, store in an airtight container or slide into food grade cellophane bags for gift giving.

Makes about 24


.
Did you like this post?
How about subscribing
in a reader or by email? It's quick and easy.
.

Kristal's No-Bakes

This week's recipe is republished from Kristal's blog The Art of Life. If you like this recipe, be sure to visit her blog and get to know this sweet and very funny talented mom, artist, ... and someone I would love to be neighbors with.

And I understand exactly how she feels about the clean peanut butter jar.
-Pam

Some Favs

If you haven't learned more about me than you wanted yet, here's more.

My favorite cookies are No Bakes.


  • 2 cups sugar
  • 1/2 cup milk
  • 1/2 cup or 1 stick butter
  • 1/2 cup baking cocoa
  • 1/2 cup creamy peanut butter
  • 2 1/2 cups quick rolled oats
  • 1/2 teaspoon vanilla
In a saucepan, bring sugar, milk, butter, and cocoa to a boil for 3 minutes. Remove from heat. Add peanut butter, oats, and vanilla; mix well. Drop by rounded teaspoon onto wax paper. Remove when cooled.


While making this yummy treat this past week, I happened upon another one of my favorite things: a thoroughly cleaned out peanut butter jar. Weird, I know. But for some reason I just love getting in there with a rubber spatula and getting everything I can out. Maybe it's a compulsion, maybe I'm just cheap, or maybe I want to make it easy for recycling. For whatever reason I feel a strange sense of pride whenever I see this:

Fruitcake in a Jar

There has been some talk of "quick bread in a jar" recipes in my social bubble. The concept intrigued me to look into this and I think this would be a fun and unexpected treat to give someone over the holidays. Two of the men in my family appreciate food gifts, so I think I'll pull out the canning jars and make some bread. And fruitcake. Yes, we are a fruitcake-eating family.

Ok, well, I am a fruitcake-eater and I have a family. If you give our family a fruitcake, it will be eaten. I think the hubby might eat it if it was homemade. That's how I got started.

If you know someone in the fruitcake-eating minority, this nifty treat may be just the ticket for your holiday gifting. You could bake the cake in half pint widemouth canning jars. When it's time to give them on your Pass It On Plate, you could lay a doily or decortive kitchen towel on the plate, place four to six jars on the plate, slip on the PlateWrap, and voila! You have an absolutely unforgettable gift for your own personal fruitcake-eater.

This would work well with other quick breads. Here's a link to the site where this recipe, and other "bread in a jar" recipes were discovered: http://www.astray.com/recipes/?show=Fruitcake+in+a+jar
-Pam

Fruitcake in a jar

Yield 8 Servings

2⅔ cup sugar
⅔ cup vegetable shortening
4 eggs
⅔ cup water
2 cups fruit (see note)
3½ cup all purpose flour
¼ teaspoon ground cloves
1 teaspoon cinnamon
1 teaspoon baking powder
2 teaspoons baking soda
1 teaspoon salt
⅔ cup raisins or nuts

Use wide mouth pint size canning jars, do not use mayonnaise jars, etc. Be sure to sterilize the jars, and tops according to manufacturer's directions.
Grease the inside but not the rim of the jars to make batter: dredge the raisins and/or nuts in some of the flour.
Cream together the sugar and shortening. Beat in the eggs and water. Add the fruit. Sift together the flour, cloves, cinnamon, baking powder, baking soda and salt. If desired, mix raisins and/or nuts into the batter. Note - the two cups of fruit is up to you. You can use any mixture of fruit that you like but no more than two cups.
• Two cups grated apple
• 1 1/2 cup applesauce and 1/2 cup pineapple,
• 2 cups shredded carrots,
• Mashed bananas, etc.
Pour batter into the sterilized jars 1 measuring cup of batter per jar. Do not use more or cake will overflow. And the jars will not seal. Place jars evenly spaced apart for browning on cookie sheet.
Place in preheated 325-degree oven.
Bake about 45 minutes, or until a toothpick inserted in the center comes out clean.
Remove jars one at a time using two potholders (jars will be very hot) leave other jars in the oven but work fast. Wipe the rim. Place the metal disc on top in place then twist on screw ring to secure. You will hear it seal with a "ping" sound quite fast.
Open the oven, remove another jar and repeat.
Generally, any quick bread recipe works, but be sure to measure one cup of batter per jar. The cake will slide out whole, or it can be cut into sticks.
The cake should last for one year.
NOTES: great for gifts

Posted to Bakery-Shoppe Digest V1 #217 by Lea <lhoover@...> on Sep 04, 1997

Apple Crostata With Cheddar Cheese

Chef Frank from Deaf Chef At Large posted this delicious recipe last summer, but thought it would be a perfect dessert over the holiday season. Its rustic appeal of this tart is ideal for any casual gathering. If you like this recipe, please visit his blog for more classic recipes.

Apple Crostata With Cheddar Cheese


Crust

1 Cup All-purpose Flour
1 Teaspoon Sugar
1/4 Teaspoon Salt
1/2 Cup Chilled Unsalted Butter - (1 Stick), cut 1/2" pieces
1 Large Egg Yolk
1 Tablespoon Ice Water, or more if needed
1/2 Teaspoon Vanilla Extract

Filling
1/4 Cup Sugar
1/4 Teaspoon Ground Cinnamon
1/4 Teaspoon Ground Ginger
1 1/2 Pounds Fuji Apples - (about 3 Large), peeled, quartered,
Cored, Cut Into 1/4"-thick Slices
1 Tablespoon Unsalted Butter, cut small pieces
8 Ounces Sharp Cheddar Cheese, cut 8 wedges

For Crust: Mix flour, sugar, and salt in processor. Cut in butter, using on/off turns, until mixture resembles coarse meal. Whisk yolk, 1 tablespoon ice water, and vanilla extract in small bowl to blend. Add egg mixture to processor; blend until dough clumps together, adding more ice water by teaspoonfuls if dough is dry. Form dough into ball; flatten into disk. Wrap in plastic wrap; chill at least 1 hour.

Roll out dough on floured surface to 12-inch round. Transfer to 9-inch-diameter tart pan with removable bottom. Trim dough overhang to 1 inch; fold dough overhang in and press onto sides of pan. Pierce crust all over with fork. Refrigerate crust for 1 hour.

For Filling: Position rack in bottom third of oven and preheat to 400 degrees. Mix first 3 ingredients in bowl. Arrange apple slices in concentric circles in crust, overlapping and fitting tightly together. Sprinkle with sugar mixture. Dot with butter.

Bake until apples are tender and beginning to brown and crust is golden, about 55 minutes. Cool tart in pan on rack at least 45 minutes. (Can be made 6 hours ahead. Let stand at room temperature.)

Serve tart slightly warm or at room temperature with cheese.

This recipe yields 8 servings.

Comments: Fuji or McIntosh apples work best for this tart; other varieties may be too juicy.

Adapted a recipe from Bon Appétit, January 2002


Pistachio Cake

My friend Mary makes these little cupcakes now and then.
They're so moist and tasty it was impossible to stop at just one.

Pistachio Cake
1 pkg White Cake Mix
1 small pkg Pistachio Instant Pudding
1 cup oil
1 cup lemon-lime soda
3 eggs

Mix all ingredients together until well combined. For 9” round layers, bake at 350 for 35 – 40 minutes. For cupcakes, bake at 350 for 30 minutes. Allow to cool before icing.

Pistachio Icing
1 small pkg Pistachio Instant Pudding
1 pkg Dream Whip topping (not prepared)
1 ½ cups milk

Mix all ingredients on low speed with mixer or wire whisk until thickened to the consistency of whipped cream. For cupcakes, spoon icing into a large sandwich baggie, snip off the tip of the baggie, and pipe onto cupcakes.

(almost) Instant Homemade Banana Bread

Every time I make banana bread I mix a duplicate batch of the dry ingredients in a large zip lock bag. The wet ingredients and instructions are written with a sharpie on the bag and then it goes into the freezer.

When the mood hits or I need a last minute food gift, I stir the wet ingredients into my dry mix and bake. Quick and easy.


The instructions I write aren't fancy; there is just enough info to get the mix from bowl to oven to cooling rack. It sure saves me time (and no mess because I don't have to haul out the flour, sugar, etc etc, measuring cups and spoons, etc etc.)


Here's the original recipe. I increased the banana in mine out of personal preference, but I just measure the dry ingredients into a zip lock bag every time I make a batch. I do this with other recipes, too, like muffins, brownies, pancakes, etc.

It's kind of like making your own Bisquick, only customized for a specific recipe. A homemade dry mix could be stored in a pantry, but because it contains no preservatives, I recommend storing it in the freezer to prevent rancidity and bugs from spoiling it.

Apple Cake (from Basic Cake Dough)


Ondossagon Favorites, originally uploaded by passitonplates.

When I was a kid, my mom bought this cookbook as a school fund raiser. The entire kindergarten class signed the cover of the book, and there is a section of recipes in the back written by the kindergartners. Of course, I don't have 300 lbs of flour to make one pizza, and I'm not sure if baking it for an hour at 10 degrees is going to net me the results I'm hoping for...

I still have this cookbook and it's one of my favorites. Some of the traditional German, Scandinavian, Czech, and Slavic recipes that the ladies in my hometown of Ashland and Moquah made just aren't in regular cookbooks. This is one of my only resources for the food I grew up with.


Autographed Cookbook, originally uploaded by passitonplates.

The inside cover of the Ondossagon cookbook is autographed by Billy Pocernich, a now-famous guy, thanks to this picture being posted on Flickr. He was one of the first graders who put together this cookbook.


Basic Cake Dough, originally uploaded by passitonplates.

Cake dough? Isn't it supposed to be cake batter?
Maybe, but this actually is a very wet dough. A surplus of peeled and sliced gravenstein apples went on top and this not-too-sweet bready cake made a great snack.


The cake dough is in a greased and floured pan, and sliced gravenstein apples are layered in three rows over the top of the cake. The recipe neglects to provide an oven temperature or baking time. The cake turned out very well at 375F for about 40 minutes. You could also try 350F for about 50-60 minutes.


Apple cake, originally uploaded by passitonplates.

Here is the finished cake. This was baked at 375F for about 40 minutes, and a clean toothpick indicated when it was done. We served it with powdered sugar sprinkled over the top, but the last of the cake disappeared when somebody spread a little home made cream cheese frosting over it.

Butterscotch Cookies


Butterscotch Cookies, originally uploaded by passitonplates.

This was my Grandma Noble's recipe for Butterscotch cookies. They're just simple little cookies but their rich butterscotch flavor got me hooked when I was a little kid and I've been a huge fan of butterscotch ever since. In fact, *gasp!* I prefer butterscotch over chocolate.

If you love chocolate, try these tempting little cookies on your Pass It On Plate and convert your friend into a butterscotch lover.
More chocolate for you!

(Grandma's handwriting is a little tight and can be hard to read when it's this small. If you click the picture you can see a larger image.)

Andi's Andes cookies

Here is your recipe for Aug 8-15, 2008
These extremely addictive cookies were brought to a work day pot luck party on plate #0803049.

Thanks, Andi, for sending the photo and recipe!
You get a free mug with a tasty gourmet drink!


Andi's Andes cookies
Originally uploaded by passitonplates

1 cup butter softened (no substitutes)
1 cup granulated sugar
1/2 cup packed brown sugar
2 eggs
1 tsp vanilla extract
3 cups all purpose flour
1 tsp baking powder
1/2 tsp salt
65 andies mint candies

in a mixing bowl, cream butter and sugars. Add eggs, one at a time, beating well after each addition. Beat in vanilla extract.

Combine the flour, baking powder and salt. Gradually add to creamed mixture. Cover and refrigerate for 2 hours or until easy to handle. With floured hands, shape a tablespoonful of dough around 42 candies, forming rectangular cookies.

Place 2 inches apart on greased baking sheets. Bake at 375 degrees F for 10 to 12 minutes or until edges are golden brown. Remove to wire racks to cool.

Classic Blueberry Muffins


Here is your recipe for the week of July 26-August 2.
Recipe courtesy of our worn (and favorite) Betty Crocker cookbook.

It's a standby at our house. This classic muffin recipe is the old fashioned muffin like Grandma used to make, not the cake-y muffin you see in stores.


The beginnings of berry muffins
Originally uploaded by passitonplates


Ready to bake
Originally uploaded by passitonplates

Notice the yellow strips of lemon zest in the batter?
(This is in a red silicone muffin pan, by the way.)
Unfortunately, this is the last picture taken of the muffins. They were devoured by hungry family members in the time it took the cook to pull them out of the oven and grab the camera.

Fresh Peaches

Here is your Pass It On Plate idea (not recipe, really) for July 24-31, 2008


Plate o' peaches, originally uploaded by passitonplates.

Here is a red Pass It On Plate filled with fragrant, ripe peaches. It's topped with the Rrrowf! PlateWrap. Can't you just smell the peaches? Mmmmmmm. That's the smell of summer.

Why stop at cookies and brownies? You can put any surplus treats from your garden or orchard onto your Pass It On Plate.

What a great way to welcome a new neighbor into the neighborhood or bring a treat to a friend at church.

Blueberry Scones

Here is your recipe for July 17-24, 2008
Thanks to Chef Redhawk for researching and submitting this - I guess it's time to go out berry picking so we can make these with fresh blueberries. Mmmmm...

Blueberry Scones

2 cups all-purpose flour
1/4 cup packed brown sugar
1 tablespoon baking powder
1/4 teaspoon salt
1/4 cup butter, chilled
1 cup fresh blueberries
3/4 cup half-and-half cream
1 egg

DIRECTIONS:

Preheat oven to 375 degrees F (190 degrees C).Cut butter into mixture of flour, sugar, baking powder, and salt. Add berries and toss to mix.

In separate bowl beat together cream and egg, and slowly pour into dry ingredients, stirring until dough forms. Knead just until it comes together, 3 or 4 times. Don't overwork the dough.

Divide dough in half. On lightly floured board, shape each half into a 6-inch round. Cut into 6 wedges.Bake on ungreased sheet about 20 minutes at 375 degrees F (190 degrees C). Serve warm!!

Recipe and Photo courtesy of www.blueberry-recipe.com

Easy Taco Dip

Here is your recipe for July 9-16, 2008 ~


This is the easiest thing I could think of to bring to work for a recent food day. Besides, a girl can't eat cookies all the time!


Plate 0803049
Originally uploaded by passitonplates


Ingredients:
1 can refried beans
Sour Cream
Salsa, your choice of heat
Shredded taco cheese
1/2 tomato, diced and drained on paper towels

Spread half a can of refried beans in the bowl of the plate. Top with a layer of sour cream, then drizzle salsa over the sour cream. Sprinkle on a generous layer of cheese, gently pressing it into the salsa and sour cream. Garnish with tomatoes.
Pass the chips!


.

A Pass It On Plate is a ceramic plate that travels from person to person, sharing food gifts and bringing goodies to pot luck dinners.

Each plate has its own tracking number which corresponds to an online Plate Diary.

As people pass their plate from person to person,

they visit our website to read messages left for them by their friends, read about where the plate has been and what it has carried, and they can leave messages to their friends before they pass it on again.


Thank you for visiting!